DevSecOps: Automating Security Testing in a CI/CD Pipeline
How to Use Teamcity and SonarQube to Automate SAST Inside An Application's Product Life Cycle

Date
Authors
Mark Rood and Lara Ares
Follow Us
Static Application Security Testing (SAST) is a crucial part of application security because of its ability to drive consistency and efficiency throughout your project. When used correctly and early on in the product delivery and development pipeline, SAST becomes a critical component to building a sustainable and secure program and gives early issue detection before problems become an issue. In this blog post, you will learn how to integrate security testing into your software development lifecycle, how to use SonarQube and Teamcity within the Continuous Integration / Continuous Development (CI/CD) pipeline, and how to review the results.
Before using SAST applications, it is important to understand that running a source code analysis scan once and fixing the issues as they come up is not enough to secure the application. This approach will lead to delays in development and problems that will never get fixed. To avoid future delays, developers must integrate the SAST application into the CI/CD pipeline. Scanning and fixing source code needs to be as continuous as the development process itself and not a separate step.
How to Integrate Static Application Security Testing (SAST) into Product Pipelines
To ensure your DevOps is continuously monitored developers can use SonarQube‘s plugin, SonarLint. This plugin is a resource that detects issues and analyze problems while in the IDE, and highlights issues before they even make it to the project version control. Another resource you will need to use are Git hooks which will check for necessary items and issues, such as an accidental commit of a .DS_Store file or credentials. Even after code makes it to the Git repository, you will need to check it as it merges into the projects branches. You can check the code using these Git hooks or by using plugins depending on the environment. Azure DevOps and other Git providers can provide events for executing specific actions, such as a branch merge or a pull request. The Git provider then forwards to an automation server, such as Jenkins or Teamcity. The server then takes that code and performs a series of steps on the repository, usually a build. SAST automation should be in this pipeline and analyzed before the build, and then after, rejecting the code if it finds issues.
When reviewing the source code, you want to make sure not to reject every piece of code. Before deciding to discard a piece of code, you need to understand the context of your application. Knowing your applications users’ privileges, sensitive information, and any network mitigations that may be in place will decrease the amount of false positive you come across. False positives stem from the SAST application’s inability to understand the full context of your application like an actual human. You should still reject the obvious items such as passwords stored in plain text, or credentials hardcoded in, but it is important to log every issue you come across during the review process. Once you have completed your analysis, upload your findings to an issue tracker such as Jira. You can correlate the issues back to the code’s findings and create tasks to address and fix each item. If an item is fixed, marked as a false positive or mitigated via another method, the ticket can be closed. You should link these issues to git commits so the next attempted pull request can subsequently be accepted.
Once you have scanned, removed false positives and mitigated, the next step would be to automate your SAST application inside the DevSecOps pipeline. When this is achieved, fewer issues will make it into the codebase and production; rapidly improving your security and developers’ skills. Integrating SAST applications allows your organization to cover a larger percentage of security vulnerabilities while minimizing your application’s overall risk.
Now that we have reviewed the basics of automating Static Application Security Testing into the delivery pipeline, we will walk through an example. To start, you will need to know how your environment is currently set up. For our example, we will have an application called DUMMY_APP and its source code will be stored within a git repository in Azure Devops. In addition, DUMMY_APP will be a C# project that gets built by Teamcity whenever a branch is either merged into the development branch, or the development branch is merged into the master.
8 Steps To Integrate SAST Automation into CI/CD Pipeline
- SonarQube plugin installation
- Project creation
- Project linking with source code
- SonarQube server set up
- Build configuration and step creation
- Build steps parameters (if needed)
- Agent requirements
- Build execution
Step One: Install the SonarQube Plugin
1. Download the SonarQube plugin from the TeamCity (TC) server using the link below: https://teamcity.jetbrains.com/project.html?projectId=TeamCityPluginsByJetBrains_TeamCitySonarQubePlugin&tab=projectOverview&_ga=2.232389855.1755810046.1613497733-1312647687.1613497733
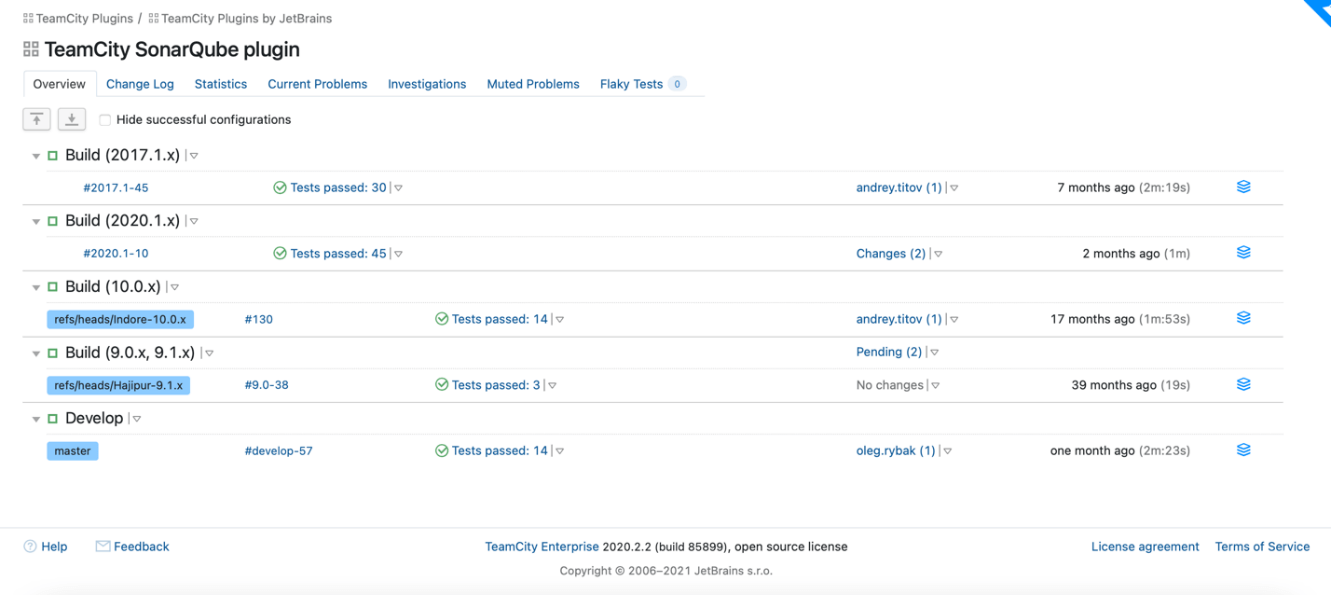
2. Next, click on the paper stack icon from the build name of your choice and download the plugin:

3. In the Administrator page click on “Plugin List” and upload the plugin by clicking on “Upload plugin zip” button:
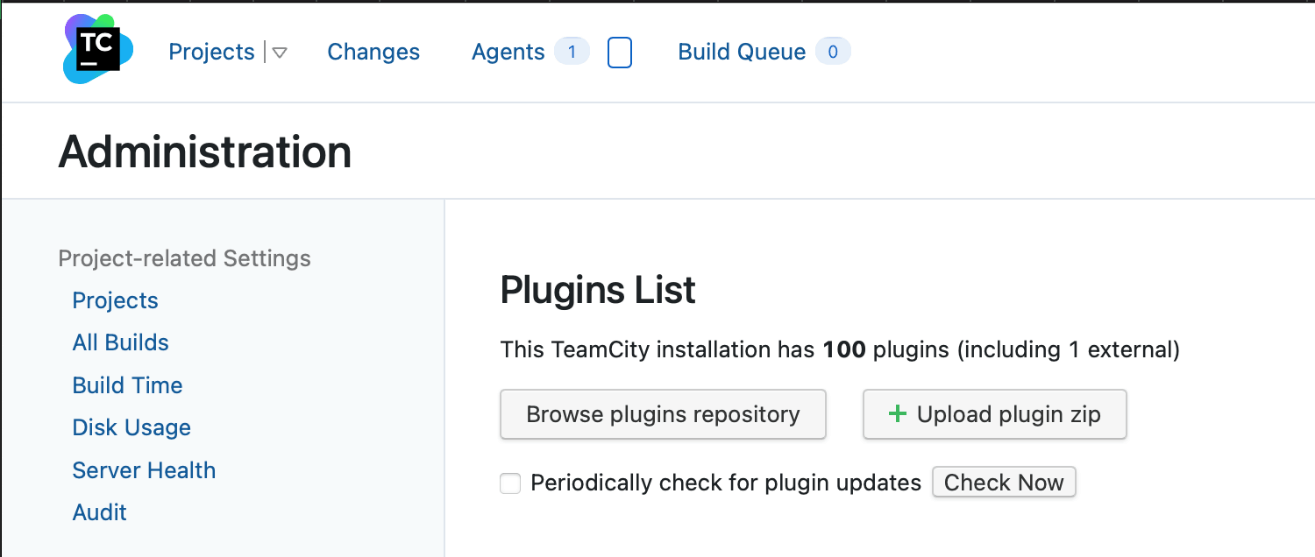
4. Once uploaded restart the server to apply changes.
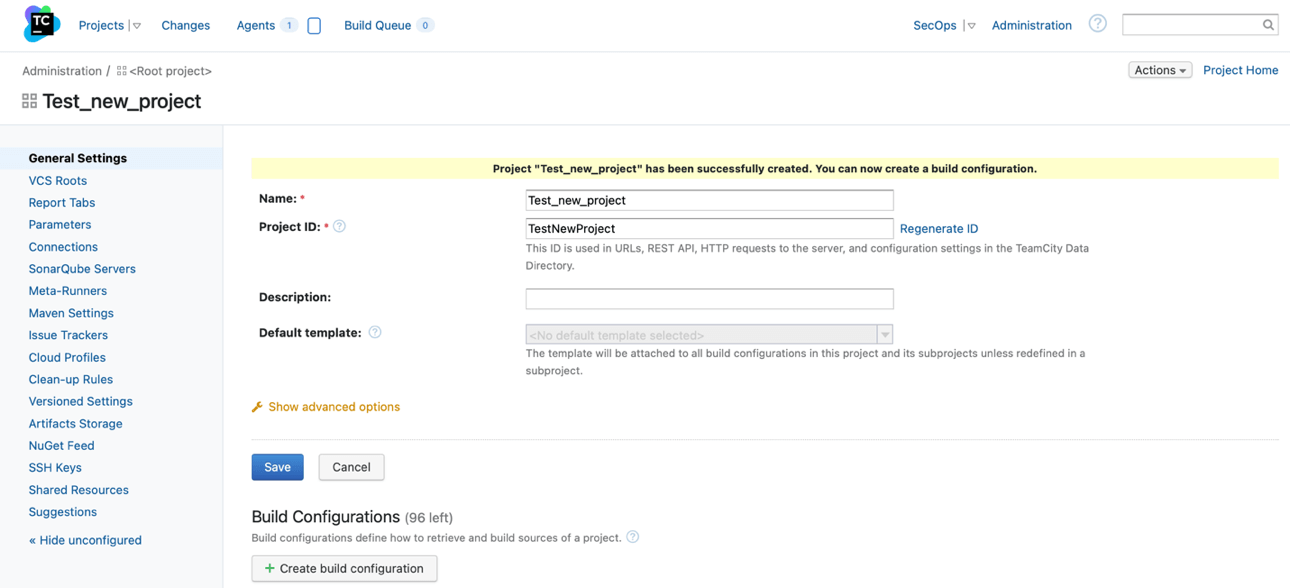
Step Two: Create a TeamCity Project
1. In the Administration page, go to Projects.
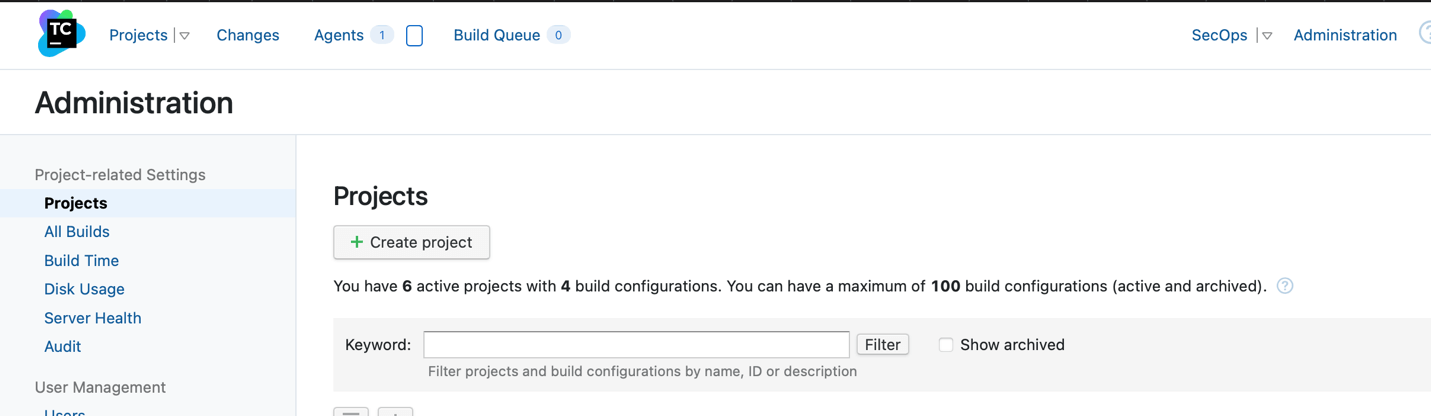
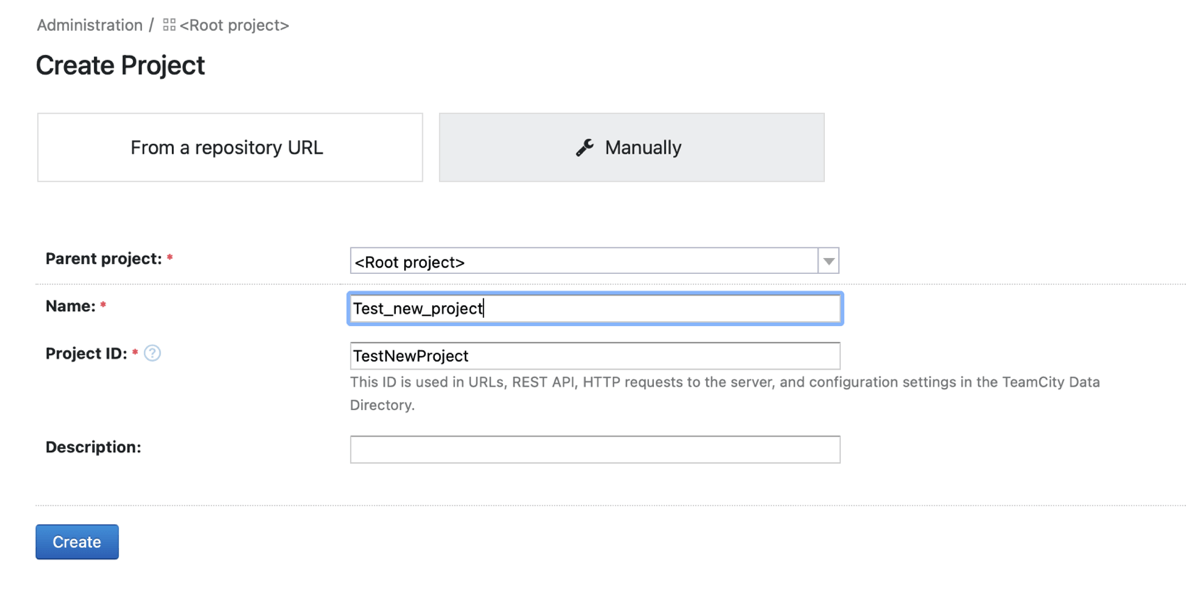
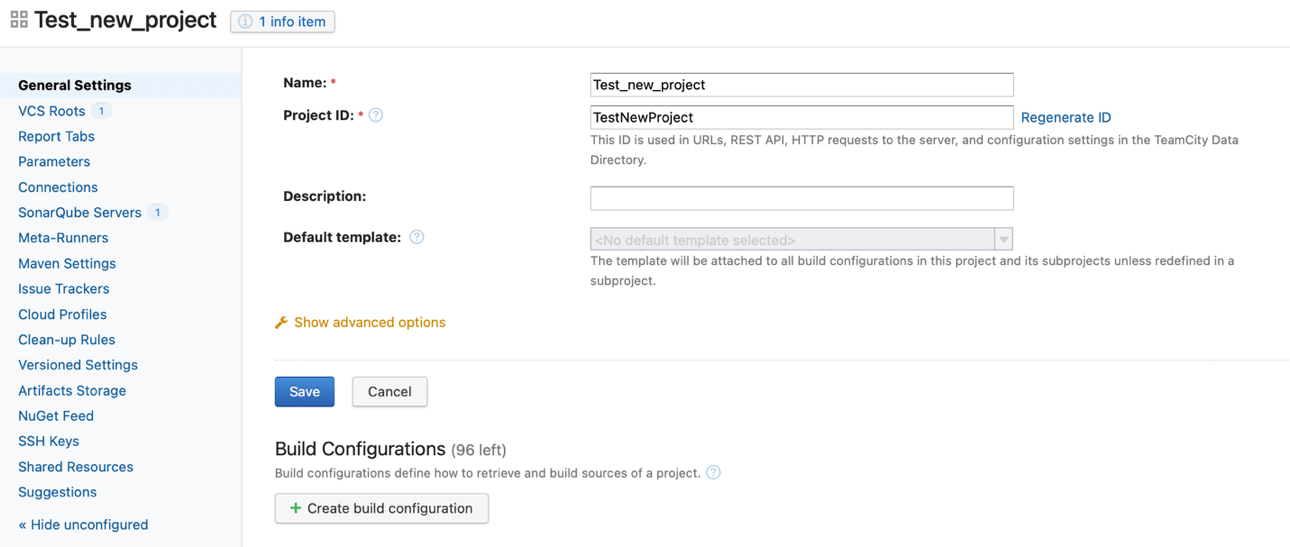
2. Click on “Create project” button. Give the project a name, and an Id. Save once completed
Step Three: Link TeamCity Project with Source Code (VCS)
1. In the project view, go to “VCS Roots”
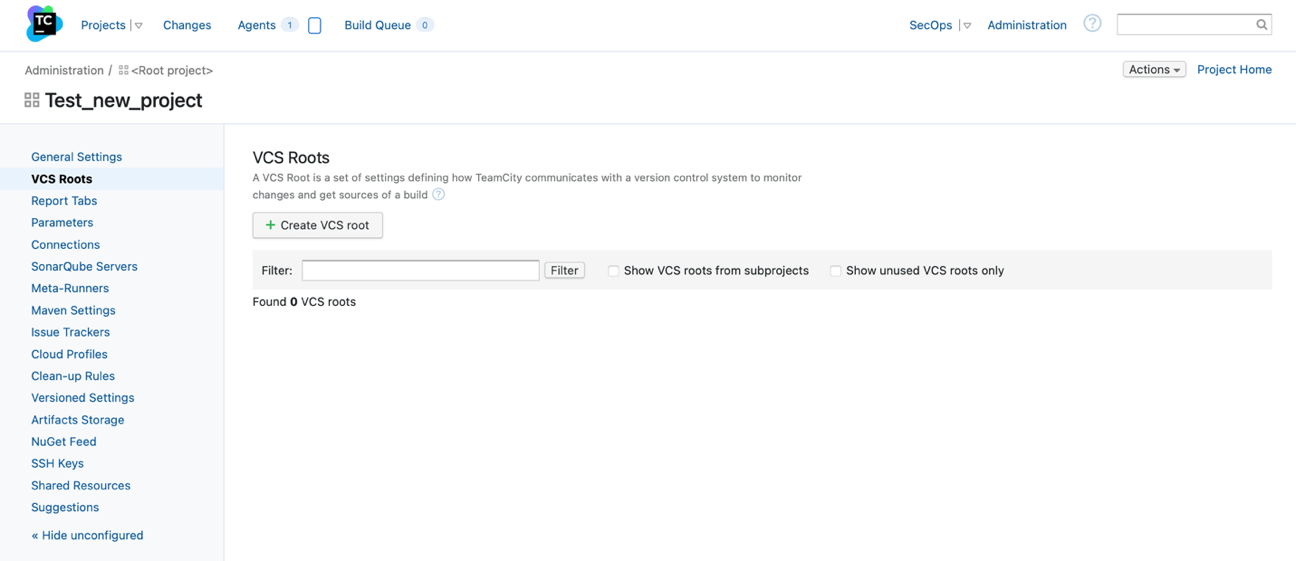
2. Click on the “Create VCS root” button
3. Fill in the relevant details to connect your version control such as: VCS root name, VCS root ID, Fetch URL, Authentication method, etc:

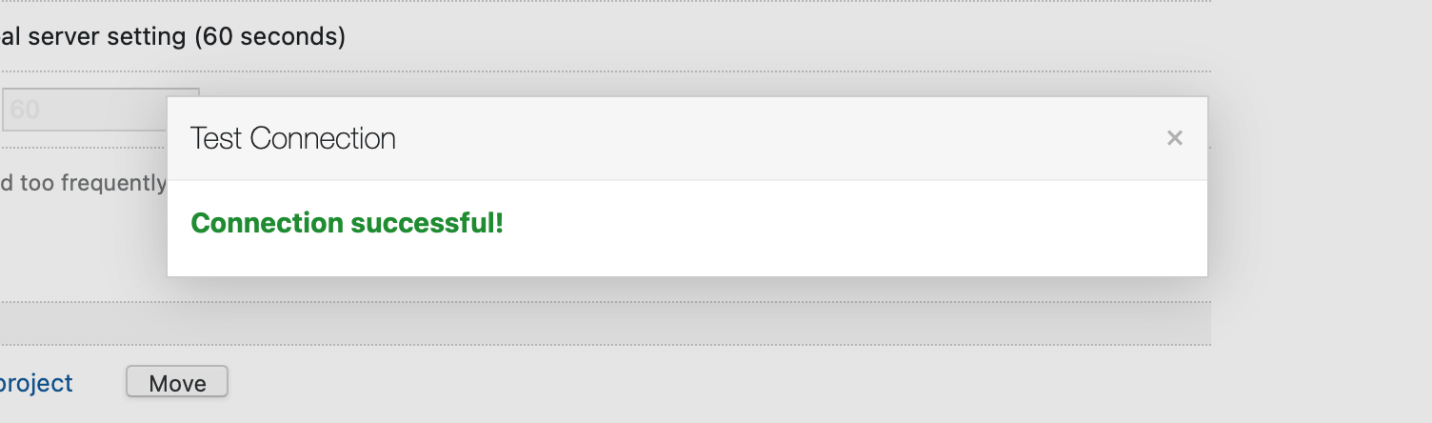
4. To make sure it was set up correctly click on “Test connection” button at the bottom of the page:

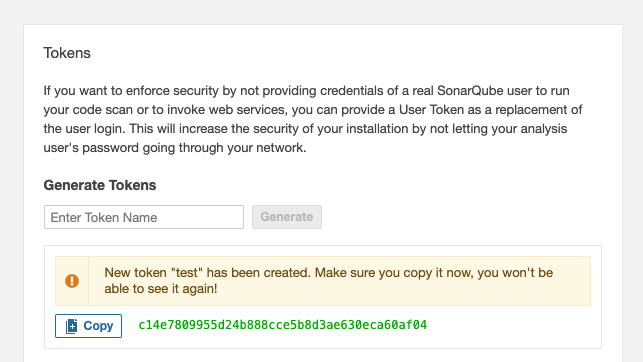
Step Three and a Half: Generate A SonarQube Token
On SonarQube, Go to My Account > Security and generate a token. Save this value, as you will not be able to view it later.
Step Four: SonarQube Server Set Up
1. Go to the projects page:

2. Click on “Edit project settings” and then go to “SonarQube Servers”:

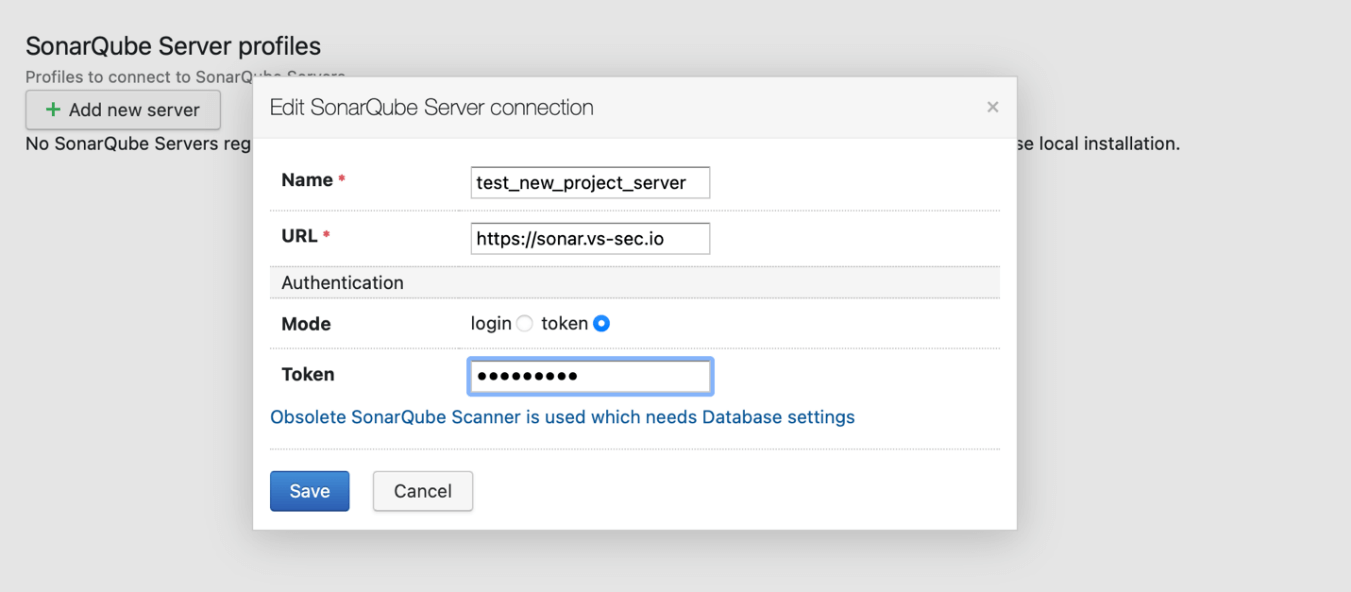
3. Click on “Add new server” button and complete the fields with the relevant information:
Step Five: TeamCity Build Configuration and How to Create Step
1.In the project view, go to “VCS Roots”
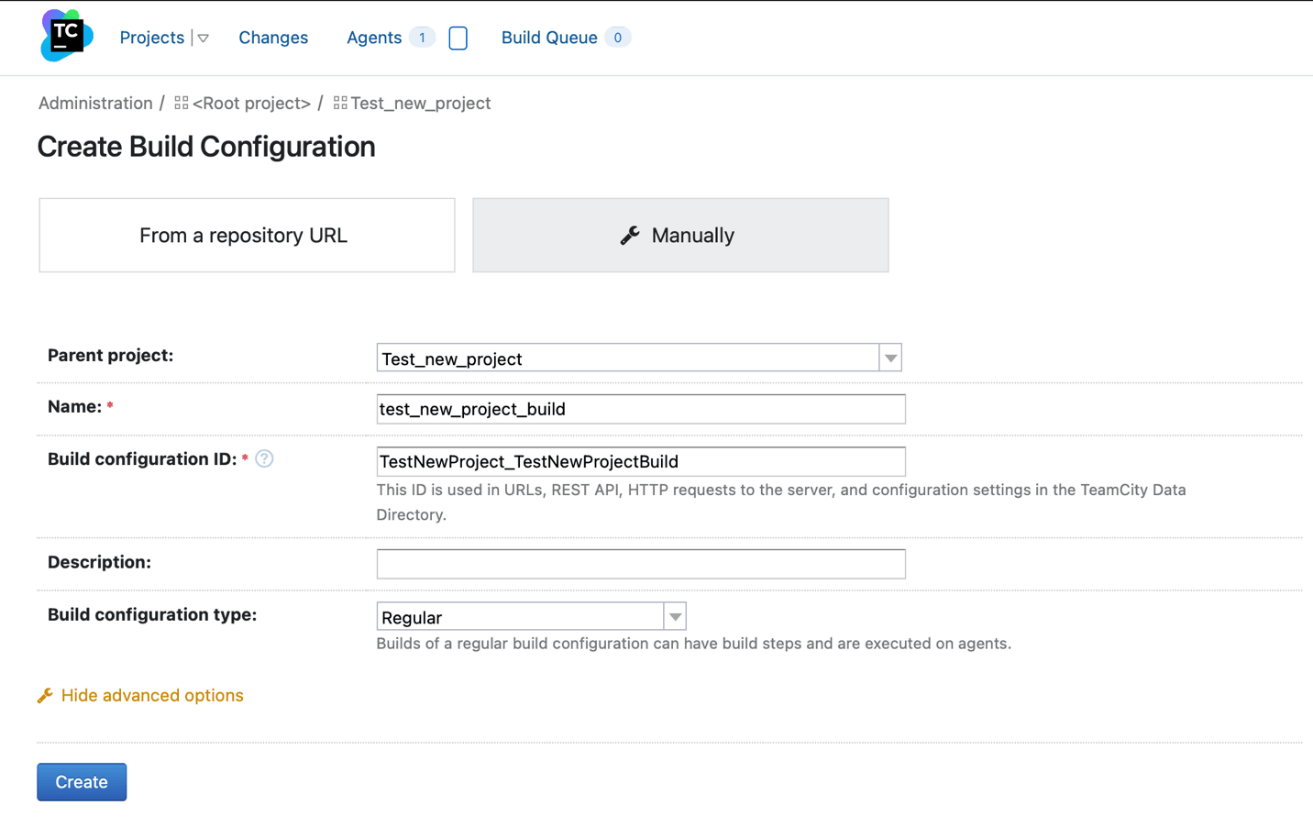
2. Fill in the fields with the relevant information:
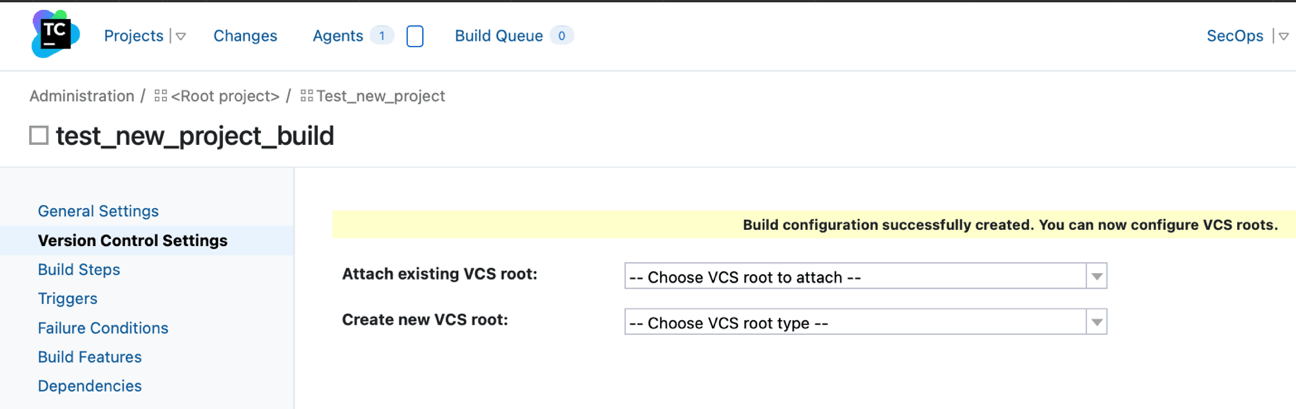
3. Configure the VCS roots with the ones created before:

4. To create the steps, in the same project view, click on the link to “Build Steps”:
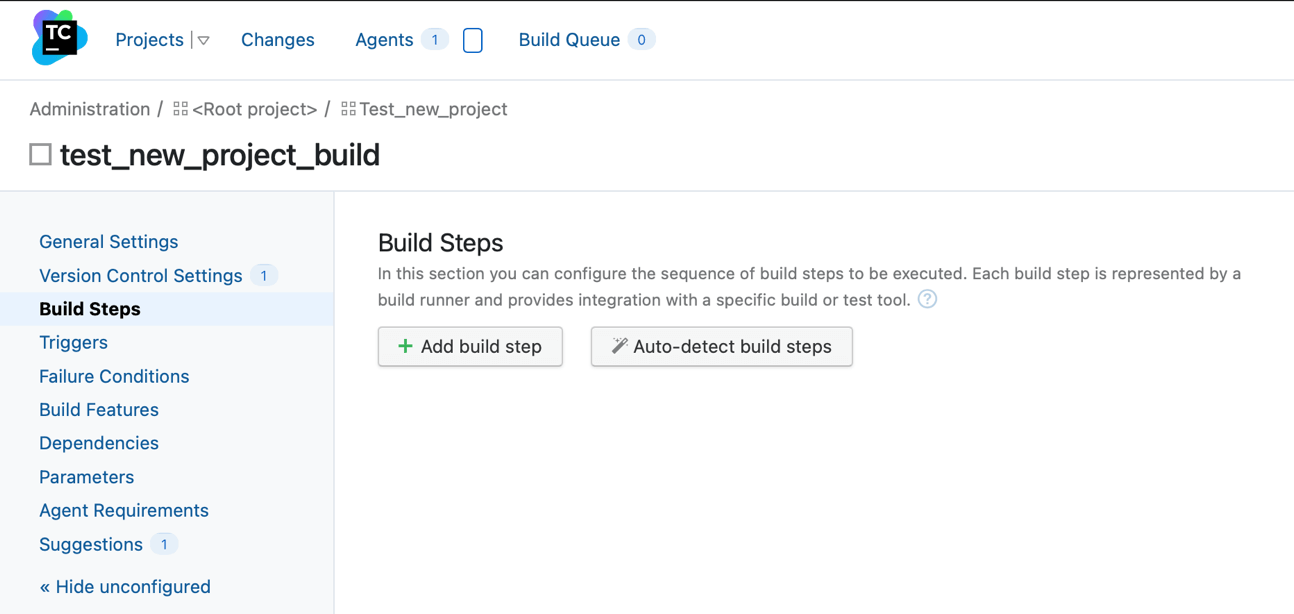
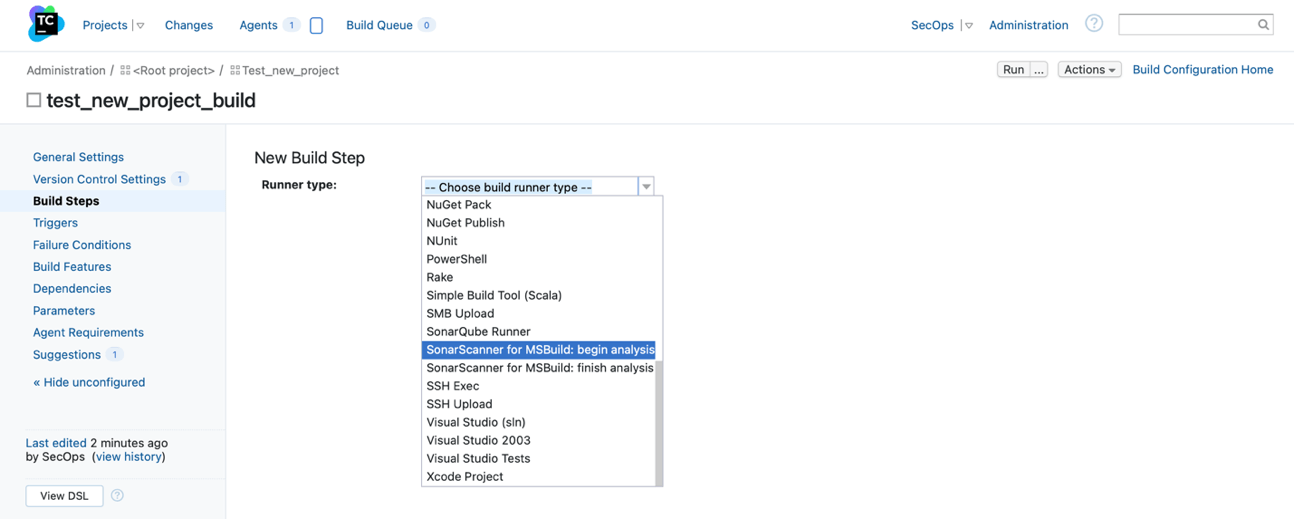
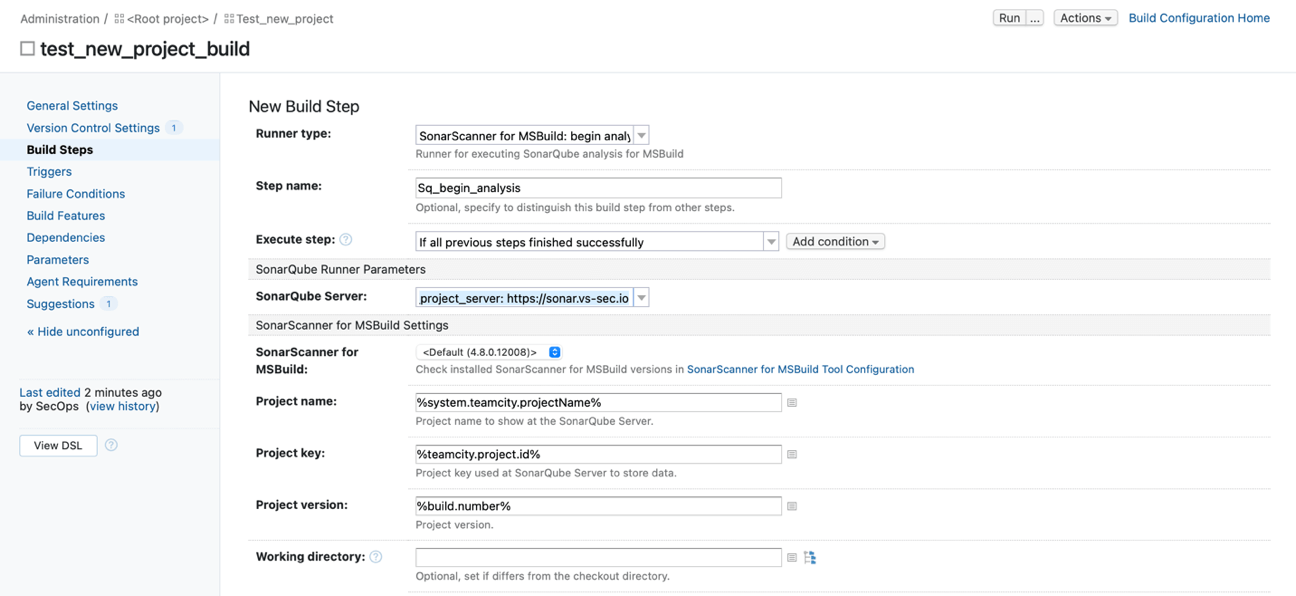
5.The first step will be to begin analysis for SonarQube
6. Fill in the relevant fields such as the SonarQube server added before
7. The 2nd step is to build the project and fill in the relevant fields

8. Save the changes and continue with next step
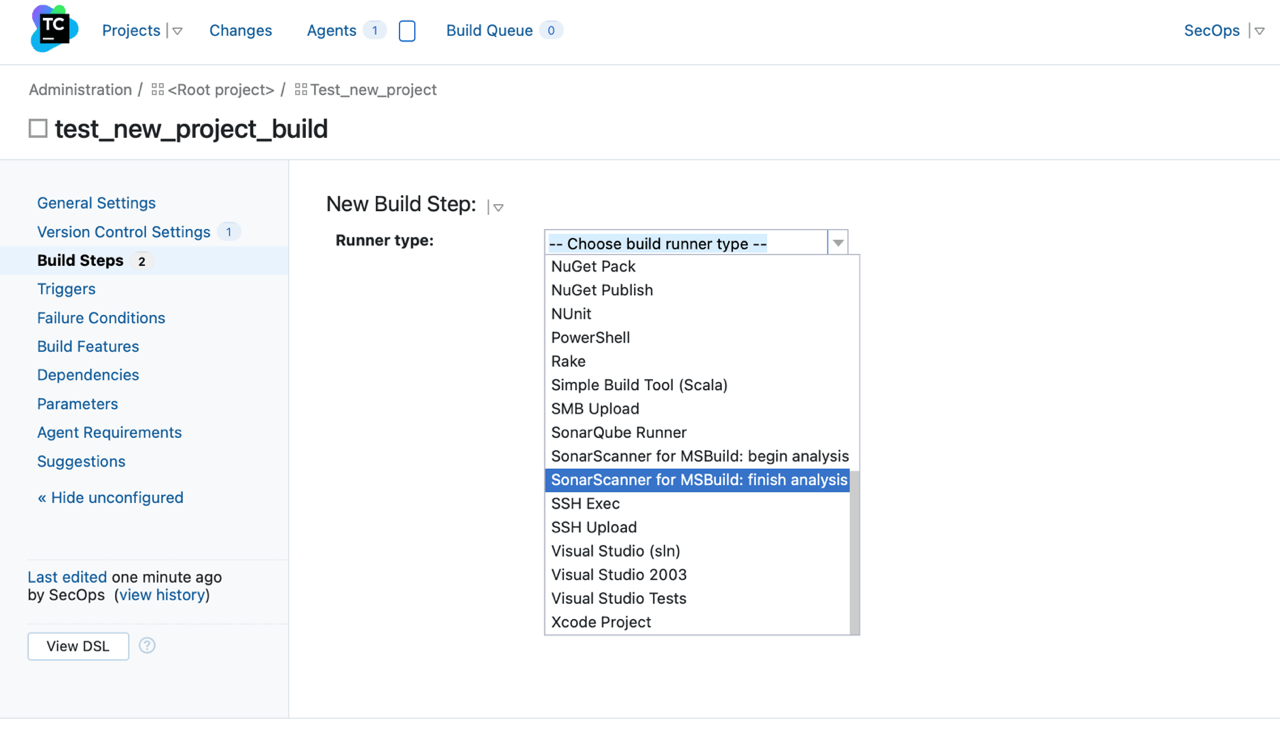
9.The 3rd step will be to finish the SonarQube analysis
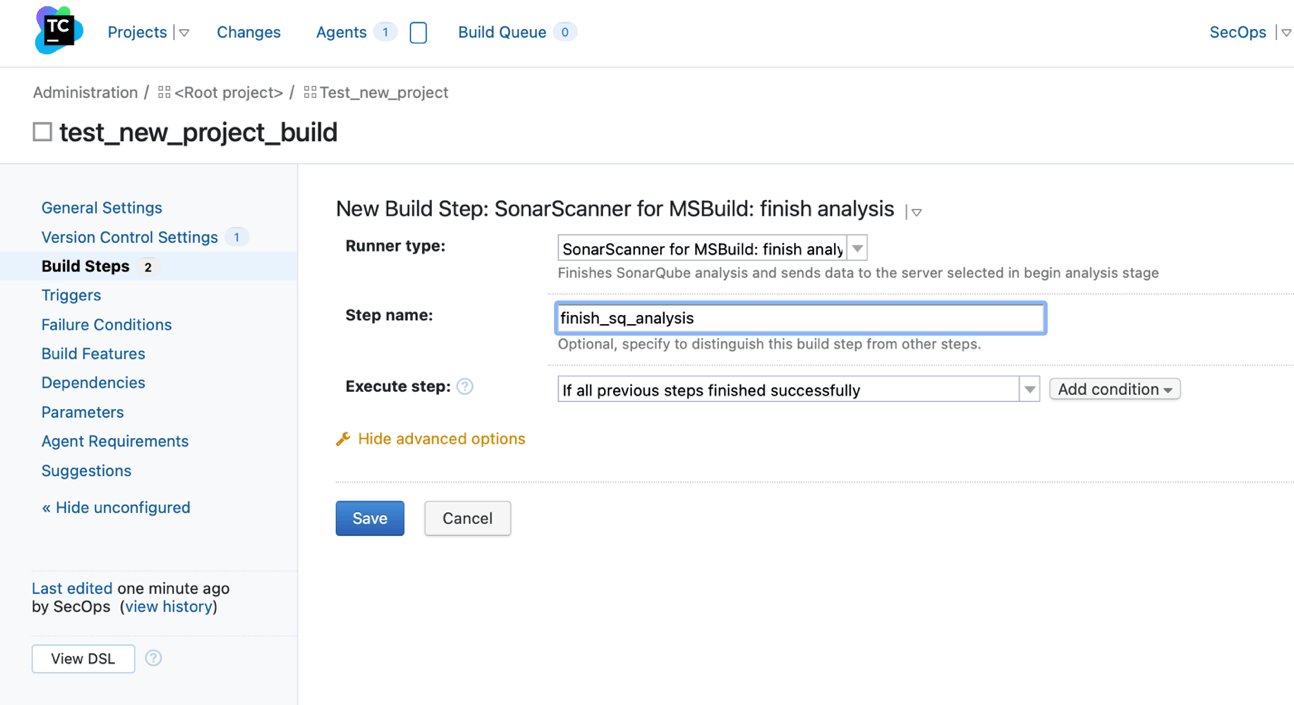
10. Save the changes
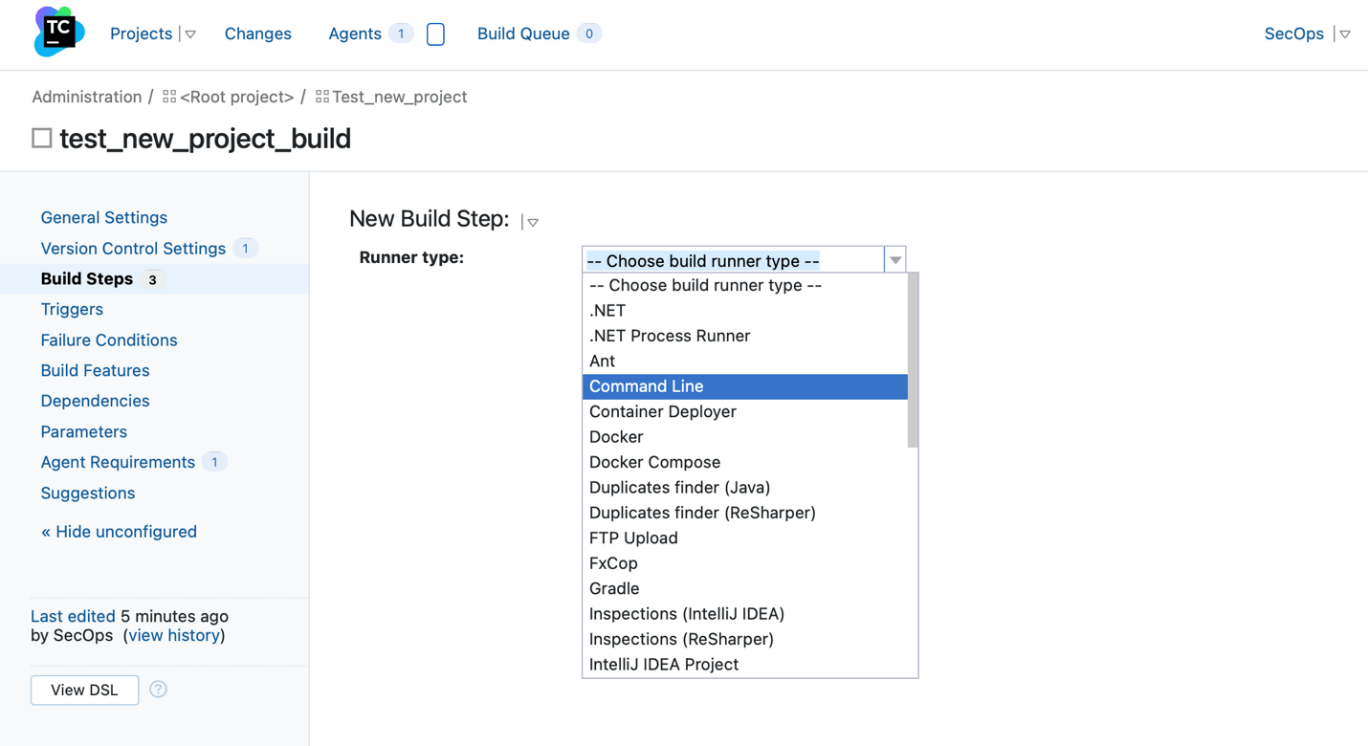
For this example, we want to create a report out of the SQ results. In order to do that, we have to connect to the SonarQube agent and upload a script that does what we need. Once achieved, we will be able to create the final step.
11. For the last step we should select “Command Line”
12. In the “custom script” section add all the necessary commands to run the script:
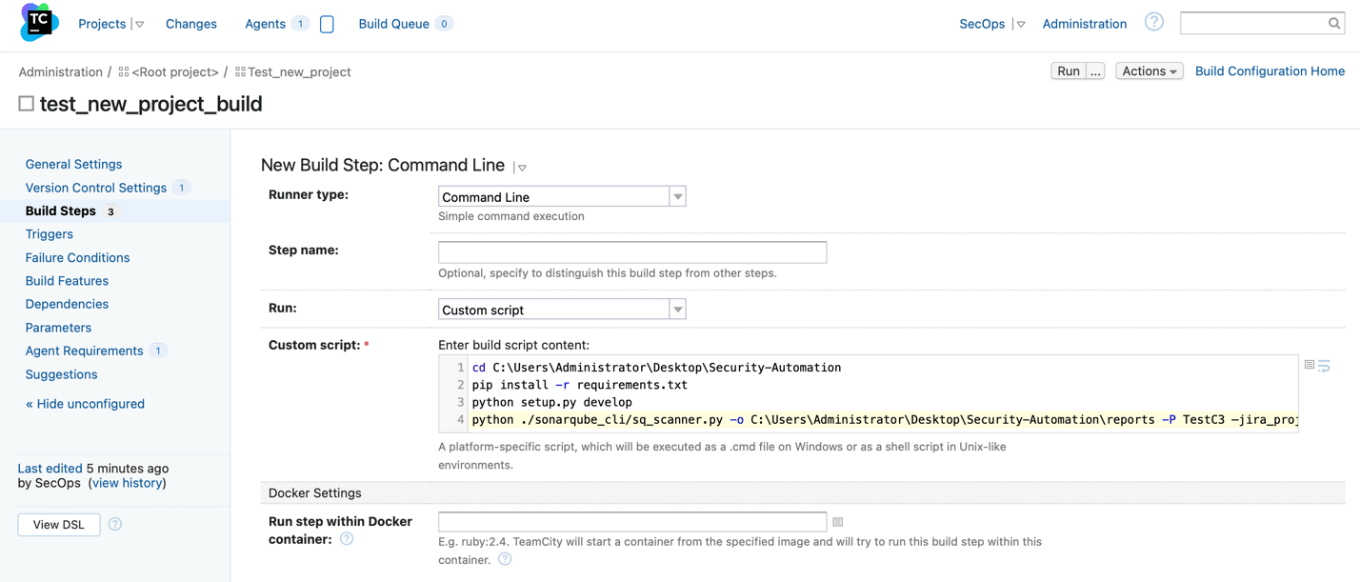
13. Save the changes
Step Six: TeamCity Build Steps Parameters
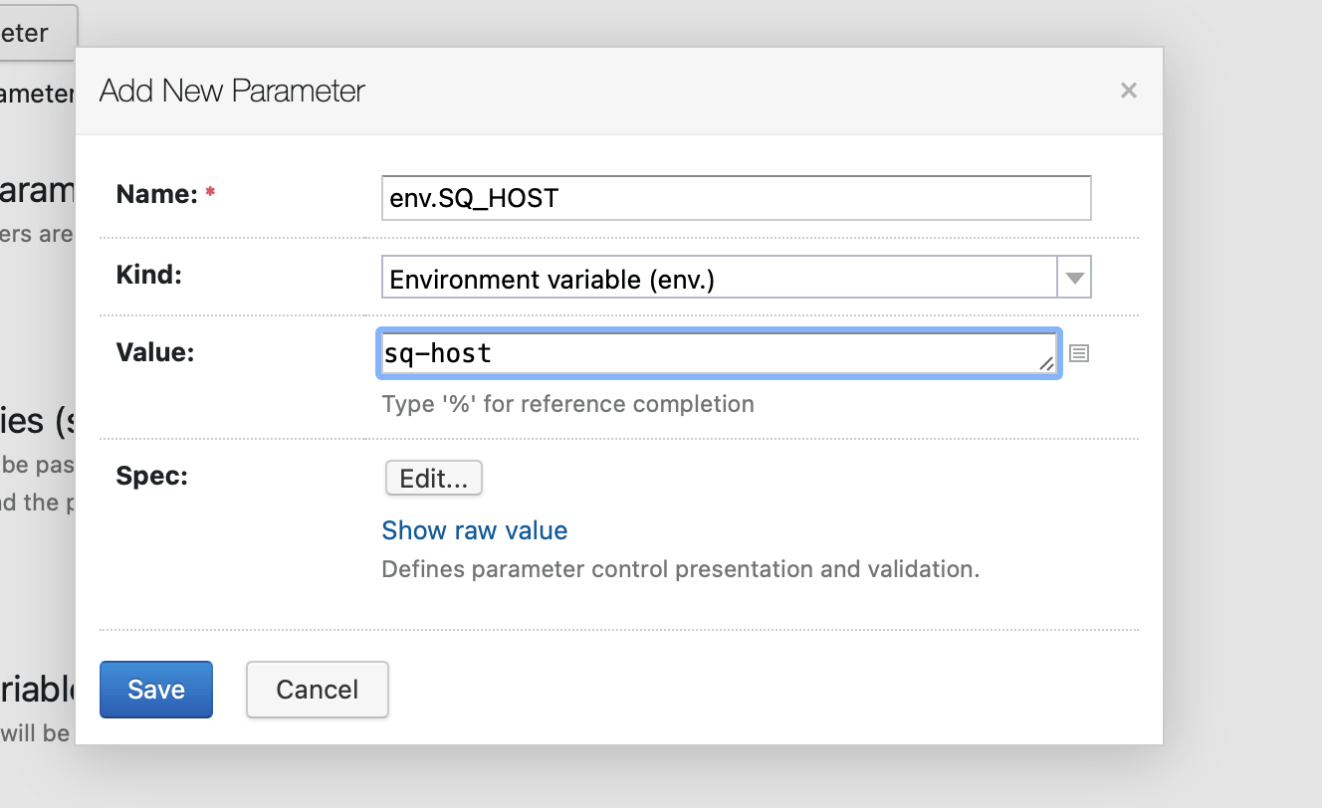
Sometimes, the script uses environment variables as it is in this case. To do so, we need to add the corresponding variables in the build configuration.
1. In the project page, go to parameters:
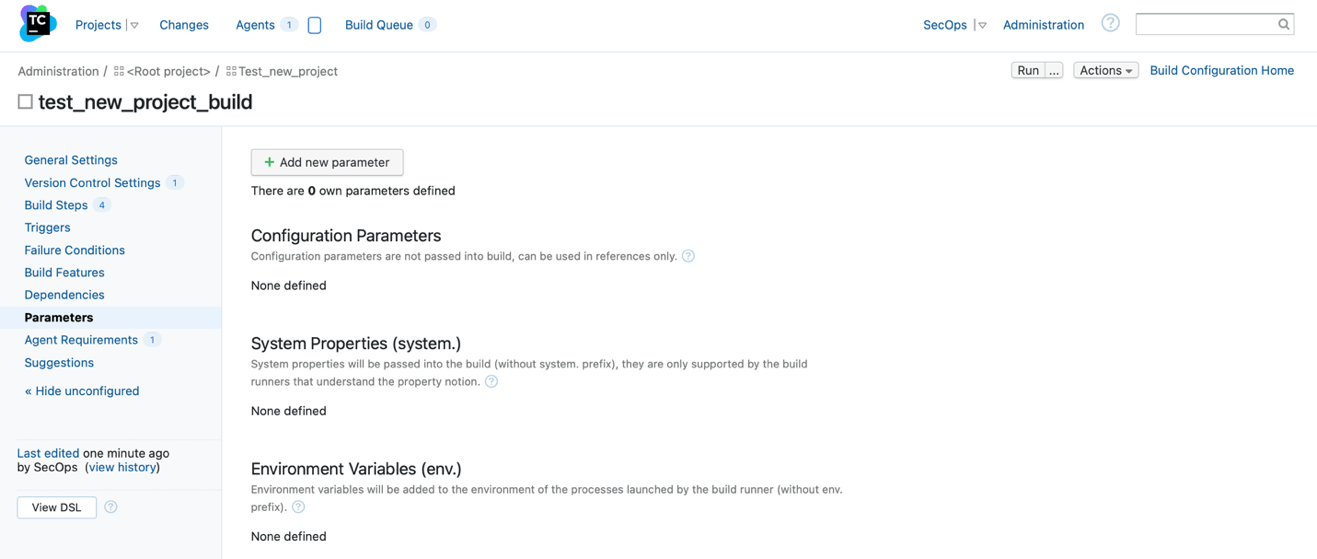
2. Click on “Add new parameter” button and fill in the fields with the information:

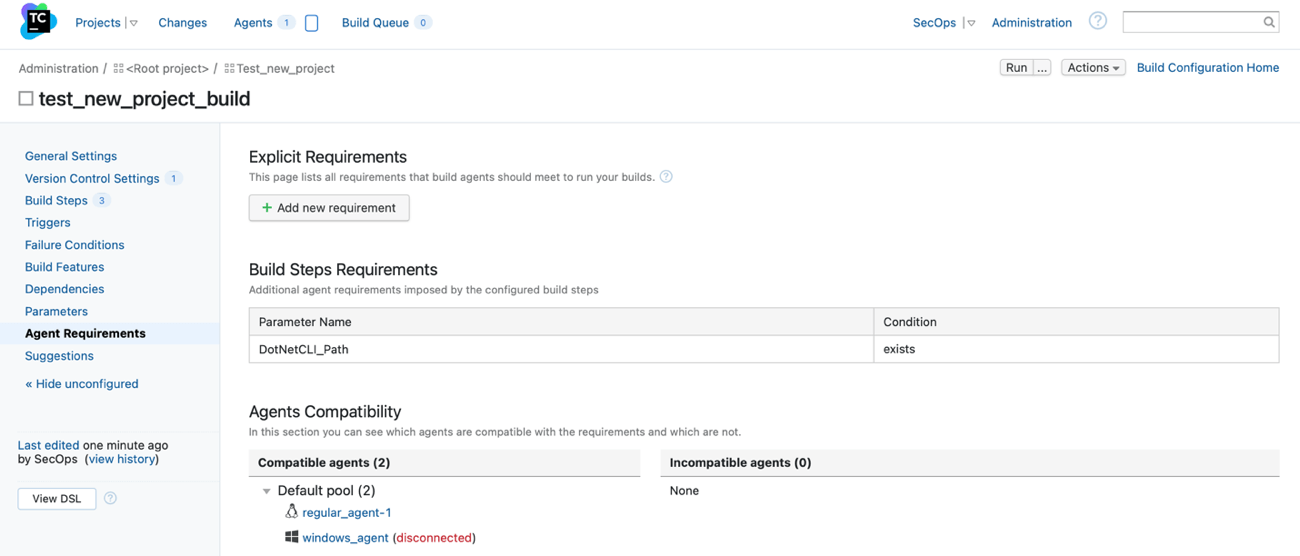
Step Seven: Create Agent Requirements in TeamCity
1. In the project view, click on “Agent requirements”
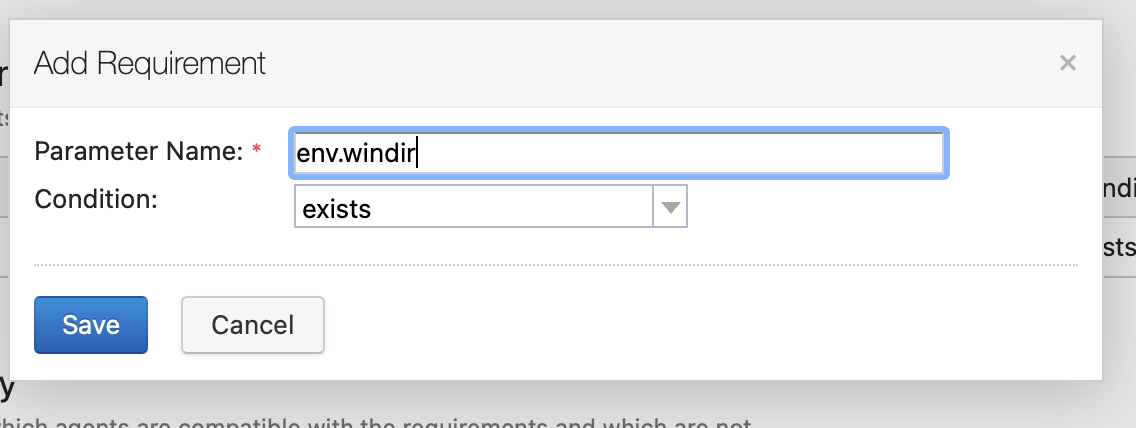
2. Add the important requirement such as checking that the agent windir variable exists
Step Eight: Execute the Build
1. Go back to the home page where all the projects are:
Once the build is done running, you can click on the build number (#X) and check the results and artifacts if any:

In this blog post, we covered how to automate SAST in your product delivery pipeline with a step-by-step tutorial using SonarQube. It is essential to understand that this post is a generic example and does not include several configuration steps. When properly implemented, SAST applications will help you shift your security left, ensure secure coding during the development stages, and increase your over-development efficiency by automatically detecting vulnerabilities.
VerSprite Helps Software Developers Secure Their Code
For many organizations, DevOps is outrunning application security. We find this often because the specific skills that marry development and security are a scarce commodity. At VerSprite, we work directly with your development processes to augment your process by adding automated security gates and remediation.
With our extensive experience in developing and delivering both consumer and business products on a large scale, our SecOps team of developers will help your organization deploy and maintain secure applications. Learn More →